

This post may contain affiliate links. As an Amazon Associate, and at no cost to you, I earn from qualifying purchases made through some links. Please see FCC disclosure for full information. Thank you for supporting this site!
In my 14 or so years of preserving apples in earnest, first with apples foraged off public spaces in our suburban community and now on our own acreage, I've certainly experimented with a lot of methods and recipes. But year after year, I dehydrate apples because it is easy and relatively fast. Dried apples don't take up much room in the pantry, make a great snack (especially when you're on the go), and can be easily rehydrated to make things like pie and cobbler. Still, I know many of you haven't tried dehydrating apples because you think you'll need to buy special equipment to do so. But that's not true! Over the years, I've used a number of methods to dehydrate apples; let me show you the best methods. (If you prefer to watch the video version, please scroll to the bottom of this post or hop over to YouTube...and while you're there, be sure to subscribe to the Proverbs 31 Homestead channel!)
How to Dehydrate Apples
Begin by slicing the apples. The fastest, easiest way to do this is with an apple peeler/corer (this is the one I use), but there are other ways, too! Originally, I use used a knife. The best way I've found to cut apples into slices by hand is simply to start at the blossom end (the end opposite the stem) and start slicing. Don't worry about coring the apple just yet.

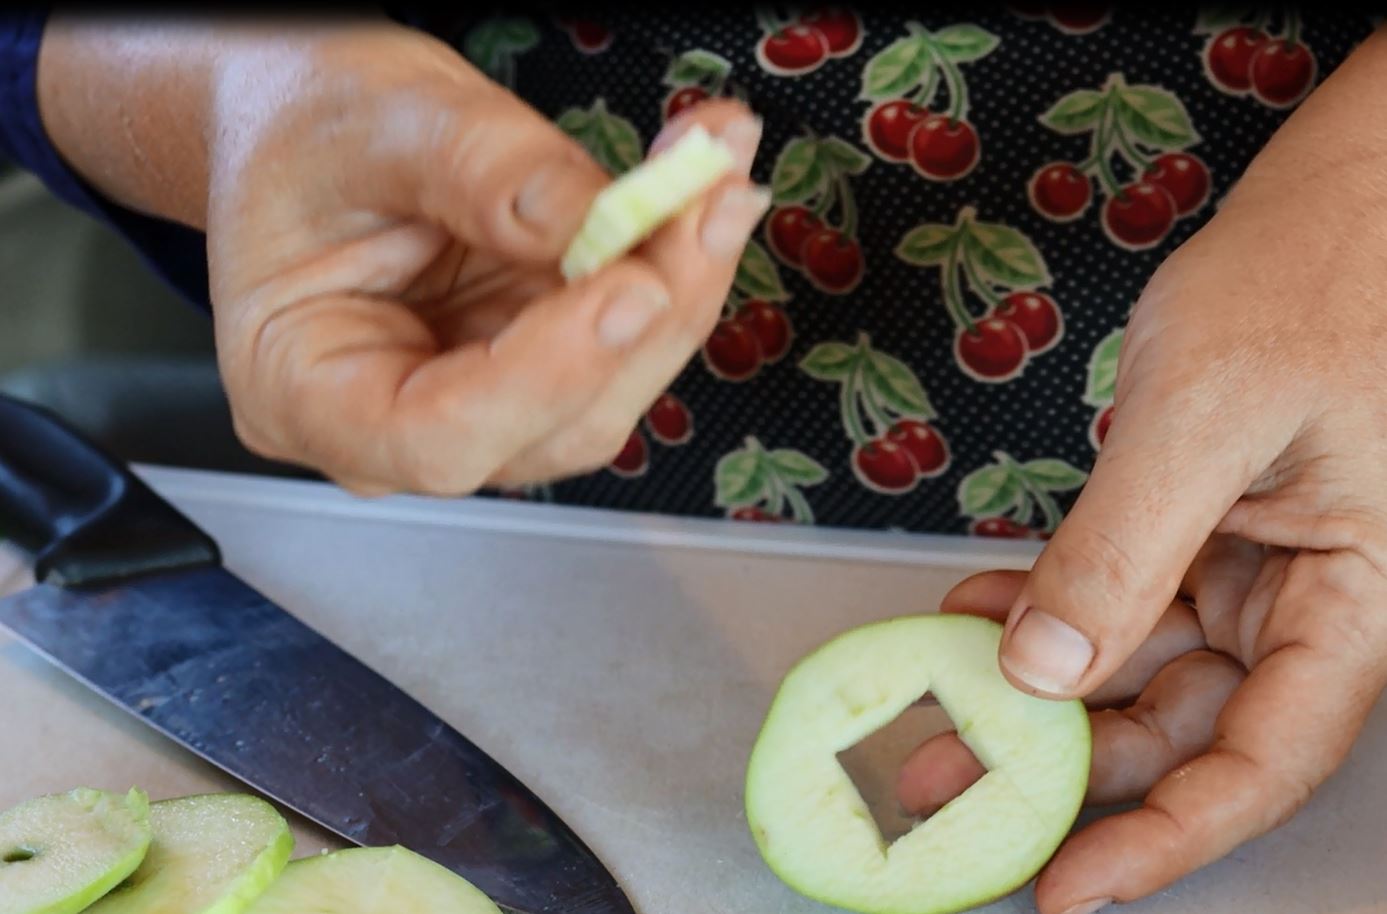
One you have the apple sliced, you can either leave the core in place (just pop out the seeds with your fingernail), or if you don't like the texture of the core, cut the cores out of each slice. I do this with a knife, making a square hole.


If you have an apple corer that works for your apples (mine, though sturdy, just doesn't get through our apples easily - though it is perfect for pitting plums!), you can certainly core the apple, then slice it. I do not recommend using an apple corer/slicer because it will create slices that are much too thick. When dehydrating apples, you want thin slices that will dry quickly. The quicker the food dries, the more nutrients it will maintain.
Apple slices will naturally begin browning when the flesh is exposed to the air. If this bothers you, fill a bowl with lemon water (1/4 cup lemon juice plus 4 cups of water) and keep the apple slices in it until you start drying them. Some people claim the lemon water helps retain nutrition in the apples, too, but I have never seen scientific evidence of that. I don't bother with lemon water, usually.
Next, lay the apple slices out to dry. The old school way to do this is to place them in a single layer on a clean white sheet (or something similar), outside in the sun. This works well if you live in a dry, hot area, but if it is humid or not very warm, your apple slices may start getting moldy before they are fully dry.
Another method is to use your oven. Place a wire cooling rack on a rimmed baking sheet and put the apple slices on the rack in a single layer. If your oven has a warming drawer, use that. If not, put your oven on its lowest temperature setting and prop the door open. (You don't want to cook your apples, which is what you'll be doing if you use a higher temperature.)


To see if your apples are really dry, tear into a piece and look for any moisture coming from the fruit. If there is moisture, keep drying. Otherwise, place the dried apple slices into glass jars with metal lids. (Plastic allows air in.) Let the apples completely cool before you put the lid in place. Store the jar in a cool, dry, dark location. Properly dried apple slices will stay good for at least a year.


Dried apples are the best! They're so flavorful and easy to use in just about anything.
ReplyDeleteMy teen son devours them!
ReplyDelete